No matter how detailed your carving is or how good your paint job the eyes are what brings a fishing lure to life, so lets go through a few techniques you can use to make a stunning pair of lure eyes.
Affiliate Disclosure: This post contains affiliate links, which means I may earn a commission if you click through and make a purchase. This comes at no additional cost to you.
1. Punching Blanks
The first thing to do in any of the processes I mention is going to be punching out blanks for the size eyes you’ll be making. These will be the backing for the eyes. 6mm or 1/4 in seem to be around the most common size for most bass lures.
Your backing is going to be what you build your eyes on top of and is also what you will use for background color so if you want holographic eyes, craft vinyl is a good option here. But whatever you choose you’ll be doing yourself a favor by picking up a cheap set of leather hole punches.
There’s 3 ways I will mention about how to add pupils or other designs on top of the color of the eyes. First is to use a smaller punch and punch out small pupils from black electrical tape and then just place them on the backing material. You could also just use the back end of a paint brush and black paint to dot on the pupils. The coolest way that I’ve found and currently use is water slide decals. More on that later.
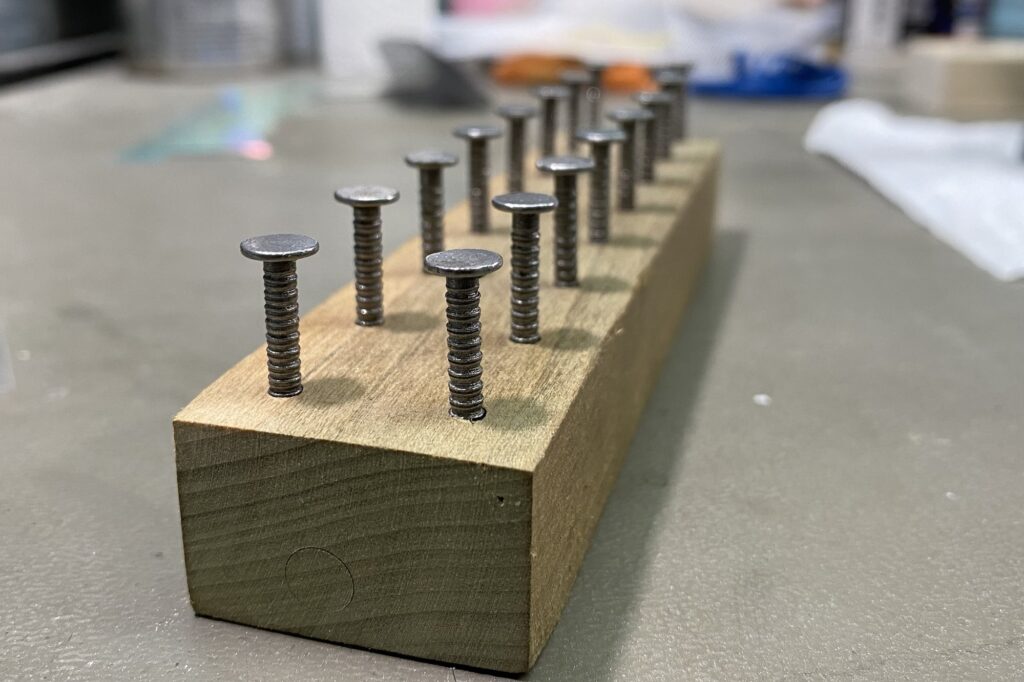
2. Eye Holding Jig
You’ll need something to place your eyes on while they cure if your going with resin or epoxy eyes and the most common way I’ve seen people do this (myself included) is to take a small piece of wood and evenly place screws or nails vertically into the wood about an inch apart from one another.
The heads of the nails will be the place you mount your backings. I attach mine with a tiny bit of Elmer’s glue but I’ve also seen people use glue sticks. The key is to have them stick to the head of the nails but you still want to be able to easily remove them later.
It would also be a good idea to try and find screws or nails with a head that is just slightly smaller than the size of the eyes your making so that the backing is fully supported but you still have a bit of an edge hanging over to be able to peel the eyes off later.
3. UV Resin
Let’s start off talking about UV resin. I just recently started using this to make my eyes and if I’m being honest, I’ll prob never use a different method because of how easy it is and the results you get are phenomenal.
If you go with UV resin though your going to need a UV light to cure them. So I’m going to put the one I use right here. Most UV resins require a wavelength of about 350 to 400 nanometers aka nm to cure.
Once you’ve got the backing of your eyes made and you’ve added a pupil by either painting, printing or punching them out. It’s then time for your resin. Hopefully you have a bottle or dispenser that has a fine tip or nozzle because you’ll only be needing a small droplet for each eye.
Drip a small amount onto each backing and they will naturally smooth over and because of surface tension it will not flow over the edge. Stick it under the UV light as close to the light as you can get them and let them sit to cure for about 30 mins. Times may vary depending on the resin and light you have but 30 minutes should be plenty.
4. Epoxy
Epoxy will be done much in the same way as the UV resin but you have to mix the 2 part epoxy and in doing so you will create bubbles. The only epoxy I’ve tried this with is devcon 2-ton, which is great as a topcoat for your lures but I wasn’t very happy with the amount of bubbles I got with using it to make eyes.
If your very careful and have an eye for detail you could probably remove most of the bubbles using something small like a sewing needle but I haven’t tried that myself. I’ve tried a torch and a heat gun with no luck and in some cases burning the epoxy and making things worse.
5. Glass Cabochons
Glass lure eyes just scream quality and have a mesmerizing look when done correctly. I will admit that I’m not the best when it comes to making them but this may be something you might want to try. Keep in mind though, glass eyes will add a decent amount of weight to your lure so you will need to compensate for this if your lures need very specific weight.
The way most people do glass eyes is by painting them with an airbrush using Pearl based colors and just dotting on the pupil with a bit of black paint on the back end of a paint brush.
An alternative method would be using the backings like in the other methods but attaching them with a tiny drop of glue which I’ve done successfully in the past.
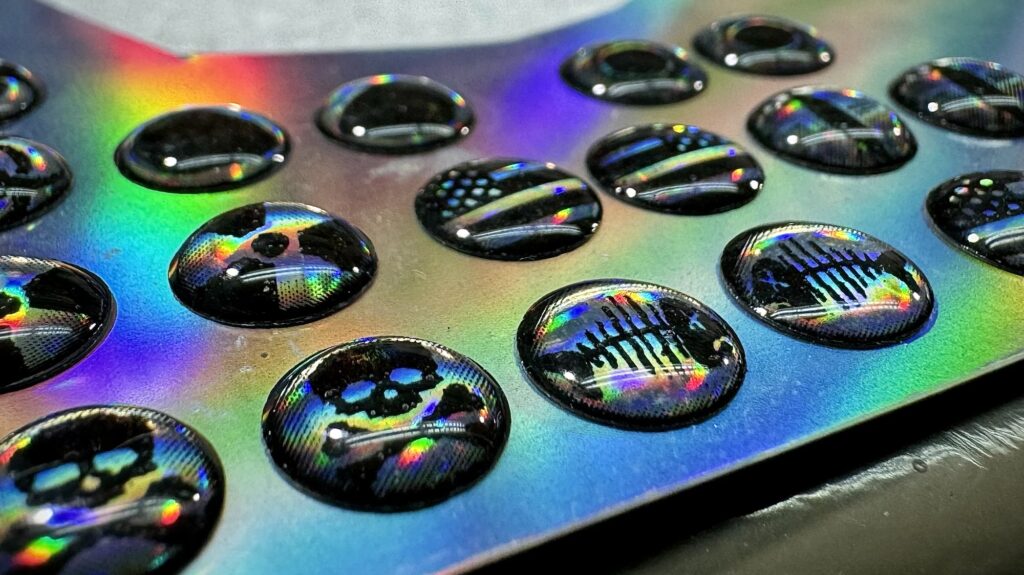
6. Water Slide Decal
You can buy water slide decal paper on Amazon and print the designs you want. For this you will need a clear coat spray paint. Basically the way you use this is to print out your design on the water slide paper, coat it lightly with about 3 coats of the clear spray paint and once it’s dry you can cut out your design and stick it in water for about 30 seconds or so. This will cause the dried spray paint to separate from the paper taking the printed design with it and giving it a clear background. You then place the still wet decal on the backing material and pat dry with a paper towel. After you’ve given it some time to dry you can then center your punch around the design and punch it out.
Keep in mind there is different water slide paper for inkjet and laser printers so make sure you buy the appropriate one you need.
Also, in order to get a clear background for your design you will need to print in greyscale, the areas you want to be the most clear need to be white basically.